Required Level: 420
Location: Rasvoy Lake (Shadowmancer Master)
Location: Rasvoy Lake (Shadowmancer Master)
-Entry count: 5x per week (5+ entries requires legend raid portal stones)


-Entry count is consumed only when the boss dies (clear raid)
-You cannot re-enter the raid if you leave the map (death, VGA-error, disconnect).
-You cannot enter the raid once phase 1 boss drops to 70% HP. Please wait for all party members to load.
-You cannot enter the raid once phase 1 boss drops to 70% HP. Please wait for all party members to load.
-You drop gems & other valuable items when you die here, so put them into storage before raid.
-Limit of 4x soul crystal uses available, and count is shared by all party members. The remaining amount is displayed next to your HP bar:

Skill limitations
-Revive (priest) cooldown increased to 5 minutes.
-Backmasking (chrono), reincarnate (chrono), resurrection (priest) share count: max 1x use per dead character.
-No reversi (thaumathurge).
-No swap (psychokino).
-No swap (psychokino).
-Modafinil (plague doctor) reduced to 33% duration.
-Chortasmata plant conversion (druid) & judgement demon conversion (inquisitor) reduced to 25% duration vs boss.

-Chortasmata plant conversion (druid) & judgement demon conversion (inquisitor) reduced to 25% duration vs boss.
Skiaclipse stat overview phase 1 & phase 2
Skiaclipse cannot destroy or steal magic circle skills.
Level
|
Rank
|
Size
|
Race
|
Attribute
|
Armor
|
Movement
|
420
|
Boss
|
XL
|
야수형 (beast)
|
신성속성 (holy)
|
판금 (plate)
|
Holding
(phase 1) Normal (phase 2) |
HP
|
DEF
|
MDEF
|
ATK
|
MATK
|
253 083 285
(phase 1) phase2: 550'000'000 |
23 838
|
23 838
|
16 238 ~ 24 357
(phase 1) 21 313 ~ 39 581 (phase 2) |
9 296 ~ 13 943
(phase 1) 12 201 ~ 22 659 (phase 2) |
Acc.
|
Eva.
|
Crit
|
CDEF
|
CATK
|
Block
|
Block Pen.
|
1023
|
420
|
708
|
787
|
1455
|
0
|
630
|
*KTOS patch on 18 July 2019: Skiaclipse DEF nerfed to be equal to MDEF
List of debuffs which work on boss
-Damage debuffs including: cleave, shield shoving, spear lunge, divine stigma, death sentence, tri-disaster.
-Damage decreasing debuffs: devaluate, lethargy, flesh hoop demoralize.
-Damage debuffs including: cleave, shield shoving, spear lunge, divine stigma, death sentence, tri-disaster.
-Damage decreasing debuffs: devaluate, lethargy, flesh hoop demoralize.
-General debuffs including: burn, bleed, poison, blind, slow, shock, fear.
-Special class debuffs such as: discerning evil, corruption, decay, necromancer bane, desmodus, mastema, aiming, circling, swashbuckling, capote, nak muay debuffs, retiarius net.
-DEF debuffs such as: devaluate, immolation, hagalaz, hexing, kagura, bodkin point, disarm.
-Passive attributes, such as: cannoneer detonate.
-Item effects such as: masinios bow, sausis gloves, smugis set effect.
-Passive attributes, such as: cannoneer detonate.
-Item effects such as: masinios bow, sausis gloves, smugis set effect.
Does not work: silence, freeze, knock up, knock down, knock back, and debuffs which have displacement side effects (like shield push, magnetic force, raise, cannister shot, pheasant), %HP reduction parts of special debuffs (corruption, decay), pied piper skills, stone curse, time forward.

Raid phase 1 cannot start until all players have interacted with the shadowmancer master. Once everyone is ready, the shadowmancer master opens a red portal.
Once you have entered the red portal, additional entry is forbidden for party members. You cannot enter the raid again if you disconnect, get VGA-error, or die and leave map. Preparation:
-Tell oracle to use divine might before you use buffs
-Tell oracle to use divine might before you use buffs
-Buffing before raid: put squire basecamp and foodtable at Rasvoy Lake, and eat food. Use enchanter shop and select the '+duration for cleric skills' option to extend your revive buffs in raid. Revive cooldown is 5 minutes in raid. Repair at squire shop and use weapon maintenance shop (make sure squire has ARTS).

Skiaclipse is located in the middle of the map. Saviours spawn South. Skiaclipse cannot move, and the side towards North is always the back-side of Boss (for rogue, and rodelero classes). Boss uses wide range AoE attacks, and summons mobs.
Phase 1 Boss Skills - Overview
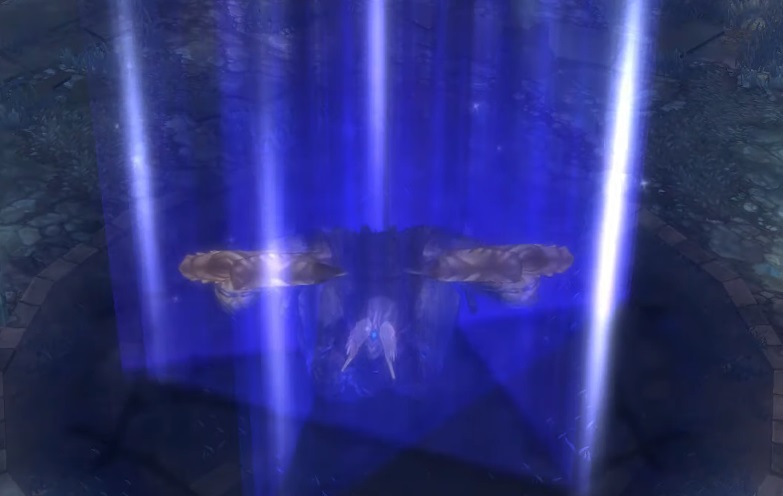
Light Pillar: 5 light pillars follow players to deal high multi-hit damage. Beware if you have magic shield(wizard) activated, or if you are using summons with hitcount-HP. This attack does not inflict stacks.
Falling Stones (inflicts stacks): stones drop in random locations. Each time a stone hits a player, that player gains +1 skiaclipse stacks.
Rock Wave (inflicts stacks): stones rise from the ground, and shoot outward. Each time a stone hits a player, that player gains +1 skiaclipse stacks. Avoid this attack by staying close to boss.
 Skiaclipse Phase 1 Rampage: if any player reaches 100 stacks individually, the boss will deal 10-20% max HP damage to all players every 3 seconds until you fail the raid.
Skiaclipse stacks do not decay, and cannot be removed. Stacks are shown on players:

HP Thresholds phase 1 - Summon invincible healing mobs
Skiaclipse summons 6 mobs, at: 70%, 40%, and 10% HP.
When mobs are alive, the boss gains a buff to reduce all incoming damage by 90%, for 3 minutes. Kill all mobs to remove the buff.
Mobs are summoned in 1 random location (northeast, southeast, northwest, or southwest), then they move towards the boss. Mobs never spawn twice in the same location.
When mobs get near the boss, each mob heals the boss for 1% HP per second. You must act fast, determine their location, and lure them away.
These mobs revive infinitely, and automatically after 5 seconds. You must kill all mobs at the same time. When the first mob dies, you must kill all other mobs within 5 seconds! Each mob has a separate revive timer. Mob revive timer:
 Mob stat overview
-Per summoning: 2 of each mob (total 6)
-Mobs are immune to joint penalty (linker).
-Mobs are not immune to other crowd control.
-Mobs are demon, dark, walking (not flying), and have around 300 critical resistance, Medium size.
-Mobs inflict a 10 seconds armour break on players (rank 99 debuff, cannot be removed).
Phase 1 to Phase 2
The boss does not move, so you should never miss your skills. Boss skills are very easy to dodge. If you die to the boss skills, either you need more DEF & MDEF, or your healer needs more practice.
The most difficult part is killing all 6 mobs at the same time, and as fast as possible. The longer you take, the more skiaclipse stacks you might get. Mob DEF is lower than MDEF. Physical classes deal more damage easily. Mobs are medium size, so players with AoE-Attack-Ratio-classes must be smart. Skills with less than 12 AoE attack ratio will make a mess of mob HP. Once you desync mob HP, it is very hard to sync HP again.
Mobs break your armour, so the tank must be careful. Crowd control is preferred over tanking. Also, these mobs jump around when they attack. Crowd control is the best way to group them.
A common tactic is to group mobs, bring them down to 20% HP, then 1 player calls for nuke: everyone spams their biggest and strongest AoE skills, as fast as possible, to wipe mobs in 5 seconds.
Recommended stats, specific class tactics, team set-ups, and tier-lists are available at the end.
Your phase 1 clear speed is a way to predict your phase 2 clear speed: phase 1 clear time x 5 = phase 2 clear speed.
You will be in big trouble if you take too long in raid. You will read about that in phase 2.
Struggles of Phase 1: Video
Clear phase 1: video
 Phase 2 - Final Skiaclipse
At 5% HP, boss automatically enters Phase 2. Immediately, a meteor drops on you. Most players get wiped right there.
Phase 2 features many attacks which ignore player DEF, wide attacks, zone attacks, gimmick attacks, the summoning of mobs.
Boss attacks are divided into 2 groups: attacks which are affected by player DEF, and attacks which deal true damage. True damage attacks ignore player DEF.
Phase 2 - attacks affected by DEF
Claw (must hit a player or it will generate stacks): skiaclipse slashes 4 times forward. This attack is always used on the player with the highest aggro. This attack must always register a hit on at least 1 player, or boss gains stacks. Each 1 stack: +size on thunder, +size on dive, +damage, +speed. At 20 stacks, the boss will enter Berserk and wipe all players. Video of berserk mode at unique raid. Evasion, block, and levitation(featherfoot) count as player hits, to prevent stacks. Summons and objects do not prevent stacks.
Thunder: boss raises its arm to summon 3 thunderbolts on players. The thunder inflicts silence and root (debuff rank 99, cannot be removed). This attack prioritizes players who are far away from boss. Red indicators appear 1second before the thunder strikes:
 Dive (only used after thunder): boss flies and dives the area. This attack is very strong and wipes players easily. Be prepared, and always expect dive after thunder hits. A red indicator appears 0.5seconds before dive impact. The boss will not dive if it cannot detect any players in the area. Clerics should use fade to prevent dive! If players are too far away, the boss will move closer, and then dive the area. You will have time to use your invincible skills or movement skills to dodge.
 Smoke blast: boss raises its arms, then fires a huge wave of smoke forward to deal damage and inflict massive knockback and knockdown. The magic damage of this attack is very high and wipes players easily. Be prepared and watch the boss carefully. Quickly use movement skills to dodge. This attack never targets the player with aggro.
 Cloud: skiaclipse spawns several clouds. Clouds deal continuous damage to players, and cannot be destroyed in any way. Multiple clouds stack to deal high damage per second. Stay away from the clouds to prevent damage. Skiaclipse spams this attack very often.
Puddle (inflicts stacks): skiaclipse spams this attack more often than cloud.
-Puddles behave exactly the same as clouds, but inflict stacks. Stacks are the same as phase 1 stacks, but their duration is limited to 45seconds (rank 99 debuff, refreshes when you get new stacks). Stacks increase the damage you receive. You already know what happens at 100 stacks. The only way to remove stacks faster, is aukuras (krivis skill scroll).
-Play well and think carefully before you run around, or the map might get very crowded.
-You must keep the boss from casting these skills at the middle of the map, or you will die easily during bone prison.
 Black Link (at specific %HP thresholds): skiaclipse teleports 2 or more players to its face, then applies a chain (link) effect to these players.
-The link slows and damages the players continuously, and heals skiaclipse.
-Just 1 player must move very far away to break the link. Archers and wizards are able to break the link easily with leap or teleport. Jumping(spacebar) does not help at all to break link, and jumping does not help you to move faster. Jumping only consumes more stamina.
Tornado (at specific %HP thresholds): a tornado appears at a random location on the map.
-The tornado moves slowly towards the boss, and the tornado grows in size every second. When the tornado touches the boss, the boss gains +1 stack every second (refer to the part about 'claw' attack for stack effects).
-The tornado is a magic circle. Use magic circle removal skills like siege burst, detonate traps, joust, or counterspell to remove it easily.
-Without magic circle removal skills, you must tank the tornado for 6 continuous seconds. Often, the tornado moves through puddles and clouds, so you will take a lot of damage if you must tank.

Phase 2 - true damage attacks
Meteor (every 35s): deals 150'000 true damage, and inflicts a 40s burn. The 150'000 true damage is split between players: 2 players take 75'000 each, and 5 players take 30'000 each. The burn (rank 99 debuff, cannot be removed) deals true damage every 2 seconds. Burn damage depends on Skiaclipse's missing HP%, and ranges between 500 to 15'000, per 2 seconds. The only way to remove burn faster, is aukuras (krivis skill scroll). Meteor drops automatically, without interrupting the boss, so the boss uses several other attacks during the meteor. Sometimes you are swarmed by Puddles & Clouds, and you have no choice but to tank the meteor. Never tank the meteor alone. Type 'MMMM' or use another way to tell players to come tank together. A yellow indicator appears, then the meteor drops after 3 seconds:

Curse (at specific %HP thresholds): 1 player is cursed. A red icon, and red circle appears on that player. The curse explodes after 5 seconds to deal 150'000 true damage in a big area. Touch another player to transfer the curse. After the transfer, you become immune to curse for 6 seconds. However, you still receive damage from the explosion. Play smart and give curse to someone who is able to survive! That player should take curse, then run far away from party. Everyone must remember the %HP thresholds for curse. Curse indicator and countdown:
 Bone Prison & Wipe (at specific %HP thresholds): Skiaclipse teleports to the middle of the map, and 1 player is instantly silenced & teleported to the middle of the map. After 3 seconds, a bone prison appears on that player, with a green safe-zone. The player is still silenced, and cannot move anymore. The bone prison deals 10% max HP damage every second.
-Skiaclipse flies and lands with a big impact. The landing impact knocks down players and knocks them very far away, unless they jump.
-Then, skiaclipse channels for 1 second and releases a 999'999 damage map-wide wipe attack. Players inside the green safe-zone do not get hit. Skiaclipse resumes its attacks immediately after the wipe attack, and often uses thunder.
-If the player inside the bone prison dies, then the safe-zone disappears. If you destroy the bone prison, then the safe-zone disappears.
-Priest must remember the %HP and cast revive shortly before each bone prison, then keep healing the trapped player. Remember to jump to dodge knockdown. Players without invincibility skills should dodge the landing impact, and get inside the green safe-zone. Wait for the wipe to finish, then destroy the bone prison as fast as possible, because the trapped player is taking very high damage every second.
-Unlike unique raid, the Legend raid bone prison has HP instead of hit-count.
Bone Prison stats: HP = 3'347'542. DEF & MDEF = 11'696. Crit resist = 410. Neutral element, neutral armour, Medium size.
-Type '1111' or use another way to inform other players when you are trapped by the prison.

Counters vs true damage - Phase 2
NO = does not work / you will die
YES = works to mitigate damage or survive
?? = inconsistent test / cannot remember
 %HP Thresholds for special attacks - Phase 2
The most difficult is the 20% threshold. Most players are unprepared and react too slow. One player gets curse, and another player gets trapped by the bone prison. If the cursed player runs towards the bone prison safe-zone, then the other players get hit by the curse explosion and die. You have 1 second to transfer the curse to a player with invincibility skill. That player is able to run away from the safe-zone, and avoid curse & the 999'999 wipe at the same time. Sometimes the cursed player gets trapped by the bone prison. That player will 100% die, and perhaps the party gets wiped too. The priest must always cast revive shortly before the 80%, 50%, and 20% HP thresholds!
Rampage Version A: skiaclipse automatically enters a rampage at a specific %HP, and will not stop until it dies. The rampage happens automatically, and does not interrupt any other boss attacks. You and your healer must be very prepared, or you will fail the raid.
Timed rampage - Phase 2
Rampage Version B: when you are inside the raid for too long, skiaclipse will go rampage to kill players:
Summon Orbs - Phase 2
Orbs are summoned at North, East, South, and West, then the orbs move towards players. When an orb touches a player, the orb turns into a white light puddle. Puddles slow players for 3s.
-Each time orbs are summoned, they move 50% faster.
-You will summon 3 mobs whenever you step on a puddle. The mobs have the same defensive stats as phase 1 mobs. However, their HP is 4'500'000, and they do not the 5 second revive effect.
-To prevent mob swarm, look closely and do not enter and leave puddles continuously.
-Or lure orbs far away, then activate them carefully by barely touching them & step away. A puddle appears but you will not summon mobs.
-Keep the bossfight away from the puddles.
-puddles are magic circles and may be destroyed easily with siege burst, detonate traps, or counterspell (and joust)
-when you destroy an orb, no puddle appears
-turn undead (scroll) works on orbs
Orb stats: HP = 2'199'871. DEF = 11'082. MDEF = 14'876. Crit resist = 507. Fire element, mutant, cloth, Small size, normal movement (not flying).

Phase 2 - ENDING & SPECIAL REWARD
At 2% HP, the Shadowmancer master deals the finishing blow to the boss.
Your character names will be displayed in a server-wide message, together with your Clear Time (minutes + seconds)!
Special Reward (character bound):
1) the first successful party of the server receives the special title 'Banisher of Crows'. Only 5 players per server are able to get this title.
2) special title during the event: 'First Conqueror'.
These titles are never available again after the event ends.
Reward: 1-3 feathers, or a crafted Varna equipment item, or Legend Skiaclipse card (+750 insect damage per card level). A cube will appear. Pay silvers to open the cube for more rewards.
Cube price (1x extra): 9'600'000
Price (second time extra): 3'840'000
Item crafting with feathers, at Blacksmith Terry:
Weapon: 19 feathers + 3 planium.
Armour: 7 feathers + 1 planium.
Varna items have higher potential than savinose items, and Varna Smugis set effect is the best effect for skill-based-DPS in the game.
Player stats for raid
Tank or Aggro
HP: 160'000+
DEF: 50'000+
MDEF: 25'000+
Block tanker
Block: 900+
DPS
Minimum of 1 invincibility skill
Attack: 20'000+
DEF: 20'000+
MDEF: 20'000+
Critical dps
Critical rate: 1200+
Healer
HP: 151'000+
DEF: 40'000+
MDEF: 20'000+
Healing: 3000+
Popular classes for Raid
Most builds are viable. It depends on your confidence, gear, and teamwork!
Healer recommendation: priest + oracle + diev
DPS: bullet corsair assassin/linker, mergen fletcher ranger, pyro/ele/tao/onmyoji, doppel high barb, fencer matador barbarian
Tank: any warrior with high HP & DEF and activated attribute for more aggro, or peltasta pick (taunt)Choose between:
A) Standard set-up with tanker: 1 heal + 1 tank + 2 DPS + final DPS or final utility.
B) No tanker: 3 DPS + 1 utility + 1 heal. Tank attacks together, inside foretell.
Healer (required for every party): requires high DEF & MDEF, high HP, and best play, because full support does not have any invincibility skills or movement skills to dodge attacks.
-Priest revive must be saved for bone prison %HP.
-Always use revive before the bone prison %HP, just in case you are the one to get silenced and trapped.
-(you are not trapped by bone prison): keep healing the player who is trapped inside the bone prison. That player receives very high damage per second.
-Jump to avoid boss landing impact during bone prison.
-Boss does not like to use smoke blast and thunder on aggro/tank.
-Boss does not turn around to use thunder. Watch out when you see skiaclipse raise its right-claw.
-If the boss turns away from the aggro for no reason, you must expect smoke blast in the face.
-Healers must remember all % thresholds and prepare in advance to burst heal the affected player if needed.
-Healer must remember who has been resurrected already. Do not waste resurrect cooldown.
-Oracles, please use counterspell to destroy orb-light-puddles, and counterspell to destroy tornado
-Use fade on party to prevent skiaclipse dive attack after thunder
-Oracle twist of fate is useful for phase 1 near 5% HP, and at phase 2 near 2% HP.
-Priests with turn undead may attempt to one-shot orbs. Prevent accidentally activating orbs! Try this at a safe distance. Turn undead is a random chance skill. It is not a guaranteed one-shot.
Aggro or Tank (if you bring one): aggro requires more help from healer than tank. Tank builds have skills to mitigate damage.
-requires sufficient DPS to keep aggro. Warriors have an easy passive provoke attribute to keep aggro.
-Remember the 30-seconds-taunt immunity if you are peltasta or matador. Do not taunt too fast.
-You must tank all claw attacks to prevent boss stacks. When you have to move to a new location, watch the boss carefully and tank remaining claw attacks before you sprint to the next location.
-Once phase 2 starts, immediately lure skiaclipse away from the middle. If skiaclipse spawns puddles & clouds in the middle, your party will die during bone prison.
-The boss will almost never use thunder or smoke blast on you.
-Stand next to the wall, and make skiaclipse face you, so your party has more room to move around to dodge attacks.
-Be careful of the gimmick portals opening. You might accidentally enter the gimmick room and lure skiaclipse to that room.
-You are the one to decide your battle location. You must look for a safe spot with less puddles & clouds, then call the number of the direction! Often, parties start moving towards 3, then 5, then 7, then 9, then 12, and so on.
-Keep an eye on your party members. Skiaclipse might have spawned clouds & puddles on them. They cannot stay and fight. You must move immediately. Remember skiaclipse rampage timer. Do not waste time.
-You must not move towards your party to take curse, because skiaclipse will claw-attack in their direction. Let the player with invincibility skills take curse instead. Keep holding aggro.
-Lancers, please use joust to destroy light puddles and tornado
DPS & utility: if you have a tank or aggro player, you must stay away from boss claw attacks.
-Stay behind the boss and watch for smoke blast, thunder, and dive.
-Boss does not like to use smoke blast and thunder on aggro/tank.
-Boss does not turn around to use thunder. Watch out when you see skiaclipse raise its right-claw.
-If the boss turns away from the aggro for no reason, you must expect smoke blast in the face.
-Use your invincibility skills if you think you cannot run away in time. Builds with featherfoot (levitation) are immune to claw, and immune to dive.
-call PASS if you have a chrono
-at least 1 wizard must have max magic shield to reduce damage from true damage attacks. Turn on Party share attribute on magic shield.
-decide before raid what you will do when orbs spawn. The boss does not wait for you to deal with orbs, so you must keep avoiding attacks. Some builds cannot kill orbs easily. Some builds have a very easy time destroying puddles (cannoneer, oracle, sapper).
-does your build have invincibility skills? Then take curse from player without invincibility skills. Run far away from party and use your invincibility skill to survive curse.
-if your tank or aggro gets curse, you should move away until the curse has activated and let healer take care of HP.
-let other players know with 'mmm' when you are in a bad position and meteor drops on you. They can move in to divide meteor damage.
-DPS is responsible for killing the bone prison as fast as possible
-Boss will not select you for bone prison if you (accidentally) use skills like chrono stop near %HP thresholds. However you must be prepared to use another invincible skill after that, just in case.
-archers and wizards should use movement skills to break black link faster
-please destroy light puddles and tornado if you are sapper or cannoneer. Stand close and use detonate traps or stay far with siege burst.
Skip gimmick: the gimmick clear grants +100% damage and +100% healing buff for 30 seconds to all players. Gimmick requires 1 player each time. You need 5 players vs boss! Nobody bothers with gimmick. Raid is very possible even without gimmick.

OLD Videos (before episode 11 & 12)
The Best Clear with Taoists Video by 튼튼
Other Videos (before patch)
The struggles of Phase 2 Video A
Meta party clear video
More Clear - success (after patch)
NiNaNo's team by 디즈니 video
-1 healer, 1 tank, 2 magic DPS (wizard & cleric), 1 summon utility
-rising build with krivis: divine stigma, melstis meltdown DEF & MDEF debuff
-Exorcist rubric easy 999'999 on phase 1 demon & dark summons
-Bokor zombie phase 1 mob lockdown with bwa kayiman
-Retiarius net for phase 1 mob grouping
(1)Blink's team by HWI TOS video
-rising lancer build for easy 999'999 with lancer's super strong DEF penetration
-remaining party composition is similar to (2)
(2)Blink's team by HWI TOS video
-necromancer flesh hoop weakening attribute + appraiser devaluate + wizard's lethargy to decrease boss damage by a lot, so they can tank boss attacks together during foretell
-cannon + appraiser + zealot penetrate boss DEF
-shoggoth draws aggro from phase 1 mobs, and shoggoth debuff buffs physical damage
-summons distract boss dive attack
(3) other Blink team by Skippy video
Legend's clear team, healer point of view video
-standard magic dps party
Vaivora's team by tsai tom video
-standard set-up with aggro warrior, x2 magic dps, healer, and falconer

Raid Music
Phase 1 - Draconic Bellum by SFA
Phase 2 - Mas Rapido by SFA
Phase 1 Boss Skills - Overview
Attack Name
|
Element
|
Cooldown time (s)
|
Range
|
AoE attack ratio
|
Skill Factor (%)
|
Light Pillar (Magic)
|
Holy
|
15
|
750
|
99
|
80 per hit
|
Falling Stones (Magic)
|
Earth
|
7
|
750
|
99
|
450 per hit
|
Rock Wave
(Physical - Strike) |
Neutral
|
15
|
500
|
99
|
250 per hit
|
Falling Stones (inflicts stacks): stones drop in random locations. Each time a stone hits a player, that player gains +1 skiaclipse stacks.
Rock Wave (inflicts stacks): stones rise from the ground, and shoot outward. Each time a stone hits a player, that player gains +1 skiaclipse stacks. Avoid this attack by staying close to boss.
Skiaclipse stacks do not decay, and cannot be removed. Stacks are shown on players:
HP Thresholds phase 1 - Summon invincible healing mobs
Skiaclipse summons 6 mobs, at: 70%, 40%, and 10% HP.
When mobs are alive, the boss gains a buff to reduce all incoming damage by 90%, for 3 minutes. Kill all mobs to remove the buff.
Mobs are summoned in 1 random location (northeast, southeast, northwest, or southwest), then they move towards the boss. Mobs never spawn twice in the same location.
When mobs get near the boss, each mob heals the boss for 1% HP per second. You must act fast, determine their location, and lure them away.
These mobs revive infinitely, and automatically after 5 seconds. You must kill all mobs at the same time. When the first mob dies, you must kill all other mobs within 5 seconds! Each mob has a separate revive timer. Mob revive timer:
Name
|
HP
|
DEF
|
MDEF
|
Armour
|
Varnaclipse
|
25'500'000
|
12'224
|
15'439
|
Plate
|
ShillEclipse
|
25'500'000
|
8'313
|
15'439
|
Leather
|
WhimEclipse
|
25'500'000
|
8'313
|
22'702
|
Cloth
|
-Mobs are immune to joint penalty (linker).
-Mobs are not immune to other crowd control.
-Mobs are demon, dark, walking (not flying), and have around 300 critical resistance, Medium size.
-Mobs inflict a 10 seconds armour break on players (rank 99 debuff, cannot be removed).
Phase 1 to Phase 2
The boss does not move, so you should never miss your skills. Boss skills are very easy to dodge. If you die to the boss skills, either you need more DEF & MDEF, or your healer needs more practice.
The most difficult part is killing all 6 mobs at the same time, and as fast as possible. The longer you take, the more skiaclipse stacks you might get. Mob DEF is lower than MDEF. Physical classes deal more damage easily. Mobs are medium size, so players with AoE-Attack-Ratio-classes must be smart. Skills with less than 12 AoE attack ratio will make a mess of mob HP. Once you desync mob HP, it is very hard to sync HP again.
Mobs break your armour, so the tank must be careful. Crowd control is preferred over tanking. Also, these mobs jump around when they attack. Crowd control is the best way to group them.
A common tactic is to group mobs, bring them down to 20% HP, then 1 player calls for nuke: everyone spams their biggest and strongest AoE skills, as fast as possible, to wipe mobs in 5 seconds.
Recommended stats, specific class tactics, team set-ups, and tier-lists are available at the end.
Your phase 1 clear speed is a way to predict your phase 2 clear speed: phase 1 clear time x 5 = phase 2 clear speed.
You will be in big trouble if you take too long in raid. You will read about that in phase 2.
Struggles of Phase 1: Video
Clear phase 1: video
At 5% HP, boss automatically enters Phase 2. Immediately, a meteor drops on you. Most players get wiped right there.
Phase 2 features many attacks which ignore player DEF, wide attacks, zone attacks, gimmick attacks, the summoning of mobs.
Boss attacks are divided into 2 groups: attacks which are affected by player DEF, and attacks which deal true damage. True damage attacks ignore player DEF.
Phase 2 - attacks affected by DEF
Attack Name
|
Element
|
Cooldown time (s)
|
Range
|
AoE attack ratio
|
Skill Factor (%)
|
Claw (Physical - Slash type)
|
Neutral
|
3
|
100
|
99
|
200 x 4
|
Thunder
|
Lightning
|
20
|
500
|
99
|
250 x 3
|
Dive (Physical - Strike type)
|
Neutral
|
10
|
200
|
99
|
2'000 x 1
|
Smoke Blast
|
Holy
|
30
|
500
|
99
|
600 x 4
|
Cloud
|
Holy
|
20 (??)
|
300
|
99
|
100 per hit
|
Puddle
|
Holy
|
10 (??)
|
400
|
99
|
100 per hit
|
Thunder: boss raises its arm to summon 3 thunderbolts on players. The thunder inflicts silence and root (debuff rank 99, cannot be removed). This attack prioritizes players who are far away from boss. Red indicators appear 1second before the thunder strikes:
Puddle (inflicts stacks): skiaclipse spams this attack more often than cloud.
-Puddles behave exactly the same as clouds, but inflict stacks. Stacks are the same as phase 1 stacks, but their duration is limited to 45seconds (rank 99 debuff, refreshes when you get new stacks). Stacks increase the damage you receive. You already know what happens at 100 stacks. The only way to remove stacks faster, is aukuras (krivis skill scroll).
-Play well and think carefully before you run around, or the map might get very crowded.
-You must keep the boss from casting these skills at the middle of the map, or you will die easily during bone prison.
-The link slows and damages the players continuously, and heals skiaclipse.
-Just 1 player must move very far away to break the link. Archers and wizards are able to break the link easily with leap or teleport. Jumping(spacebar) does not help at all to break link, and jumping does not help you to move faster. Jumping only consumes more stamina.
Tornado (at specific %HP thresholds): a tornado appears at a random location on the map.
-The tornado moves slowly towards the boss, and the tornado grows in size every second. When the tornado touches the boss, the boss gains +1 stack every second (refer to the part about 'claw' attack for stack effects).
-The tornado is a magic circle. Use magic circle removal skills like siege burst, detonate traps, joust, or counterspell to remove it easily.
-Without magic circle removal skills, you must tank the tornado for 6 continuous seconds. Often, the tornado moves through puddles and clouds, so you will take a lot of damage if you must tank.
Phase 2 - true damage attacks
Meteor (every 35s): deals 150'000 true damage, and inflicts a 40s burn. The 150'000 true damage is split between players: 2 players take 75'000 each, and 5 players take 30'000 each. The burn (rank 99 debuff, cannot be removed) deals true damage every 2 seconds. Burn damage depends on Skiaclipse's missing HP%, and ranges between 500 to 15'000, per 2 seconds. The only way to remove burn faster, is aukuras (krivis skill scroll). Meteor drops automatically, without interrupting the boss, so the boss uses several other attacks during the meteor. Sometimes you are swarmed by Puddles & Clouds, and you have no choice but to tank the meteor. Never tank the meteor alone. Type 'MMMM' or use another way to tell players to come tank together. A yellow indicator appears, then the meteor drops after 3 seconds:
Curse (at specific %HP thresholds): 1 player is cursed. A red icon, and red circle appears on that player. The curse explodes after 5 seconds to deal 150'000 true damage in a big area. Touch another player to transfer the curse. After the transfer, you become immune to curse for 6 seconds. However, you still receive damage from the explosion. Play smart and give curse to someone who is able to survive! That player should take curse, then run far away from party. Everyone must remember the %HP thresholds for curse. Curse indicator and countdown:
-Skiaclipse flies and lands with a big impact. The landing impact knocks down players and knocks them very far away, unless they jump.
-Then, skiaclipse channels for 1 second and releases a 999'999 damage map-wide wipe attack. Players inside the green safe-zone do not get hit. Skiaclipse resumes its attacks immediately after the wipe attack, and often uses thunder.
-If the player inside the bone prison dies, then the safe-zone disappears. If you destroy the bone prison, then the safe-zone disappears.
-Priest must remember the %HP and cast revive shortly before each bone prison, then keep healing the trapped player. Remember to jump to dodge knockdown. Players without invincibility skills should dodge the landing impact, and get inside the green safe-zone. Wait for the wipe to finish, then destroy the bone prison as fast as possible, because the trapped player is taking very high damage every second.
-Unlike unique raid, the Legend raid bone prison has HP instead of hit-count.
Bone Prison stats: HP = 3'347'542. DEF & MDEF = 11'696. Crit resist = 410. Neutral element, neutral armour, Medium size.
-Type '1111' or use another way to inform other players when you are trapped by the prison.
Counters vs true damage - Phase 2
NO = does not work / you will die
YES = works to mitigate damage or survive
?? = inconsistent test / cannot remember
Skill (& class)
|
Vs Meteor
|
Vs Curse
|
Vs 999'999 Wipe
|
Bear (swordsman)
|
Yes
|
Yes
|
No
|
Liberate (swordsman)
|
Yes
|
Yes
|
No
|
Muleta (matador)
|
??
|
Yes
|
??
|
Paso Doble (matador)
|
Yes
|
Yes
|
Yes
|
Backslide (matador)
|
??
|
No
|
No
|
Guardian (peltasta)
|
Yes
|
Yes
|
No
|
Shield Charger (templar)
|
Yes
|
Yes
|
No
|
Slithering (rodelero)
|
Yes
|
Yes
|
No
|
Emperor's Bane on mob (murmillo)
|
??
|
??
|
No
|
Evade Thrust (murmillo)
|
??
|
No
|
No
|
Skill (& class)
|
Vs Meteor
|
Vs Curse
|
Vs 999'999 Wipe
|
Teleport (wizard)
|
Yes
|
No
|
Yes
|
Magic shield (wizard)
|
Yes
|
Yes
|
No
|
Missile Hole (sage)
|
No
|
No
|
No
|
Mackangdal (bokor)
|
Yes
|
Yes
|
No
|
Shadow Pool (shadowmancer)
|
??
|
No
|
??
|
Shadow Hallucination (shadowmancer)
|
Yes
|
Yes
|
No
|
Stop attribute (chronomancer)
|
Yes
|
Yes
|
Yes
|
Genbu (myangsa)
|
Yes
|
Yes
|
No
|
Levitation (featherfoot)
|
No
|
No
|
No
|
Rune of Protection (runecaster)
|
Yes
|
Yes
|
No
|
Skill (& class)
|
Vs Meteor
|
Vs Curse
|
Vs 999'999 Wipe
|
Leap or Jump (archer)
|
Yes
|
No
|
Yes
|
Lied des Weltbaum (pied piper)
|
Yes
|
Yes
|
Yes
|
Friedenslied on ally (pied piper)
|
Yes
|
Yes
|
Yes
|
Friedenslied on self (pied piper)
|
No
|
No
|
No
|
Fire and Run (matross)
|
Yes
|
Yes
|
Yes
|
Skill (& class)
|
Vs Meteor
|
Vs Curse
|
Vs 999'999 Wipe
|
Fade (cleric)
|
No
|
No
|
No
|
Revive (priest)
|
Yes
|
Yes
|
Yes
|
Out of Body (sadhu)
|
Yes
|
Yes
|
No
|
Foretell (oracle)
|
Yes
|
Yes
|
No
|
Counterspell (oracle)
|
No
|
No
|
No
|
Ein Sof (kabbalist)
|
Yes
|
Yes
|
No
|
Revenged Sevenfold (kabbalist)
|
??
|
No
|
No
|
Engkrateia attribute (exorcist)
|
Yes
|
Yes
|
Yes
|
Iron Skin (monk)
|
No
|
No
|
No
|
Stone Skin (paladin)
|
Yes
|
Yes
|
No
|
Skill (& class)
|
Vs Meteor
|
Vs Curse
|
Vs 999'999 Wipe
|
Cloaking (scout)
|
No
|
No
|
No
|
Annihilation (assassin)
|
Yes
|
Yes
|
Yes
|
Mangle attribute (outlaw)
|
??
|
No
|
No
|
Blindfire attribute (outlaw)
|
??
|
No
|
No
|
Rampage (outlaw)
|
??
|
No
|
No
|
Mokuton no Jutsu (shinobi)
|
??
|
??
|
??
|
Bloody Overdrive attribute (bulletmarker)
|
Yes
|
Yes
|
Yes
|
Ritirarsi (ardito)
|
Yes
|
Yes
|
Yes
|
Redemption (sheriff)
|
??
|
No
|
No
|
Burrow (rogue)
|
No
|
No
|
No
|
Other skills & effects
|
Vs Meteor
|
Vs Curse
|
Vs 999'999 Wipe
|
Card effect (Stone Whale Card)
|
??
|
??
|
??
|
Gyvenimas Shield (Velcoffer set effect)
|
Yes
|
Yes
|
No
|
Goduma effect / shield (Varna set effect)
|
??
|
??
|
??
|
Gymas effect (Varna set effect)
|
??
|
??
|
??
|
Squire food buff (basecamp & foodtable)
|
Yes
|
Yes
|
No
|
Boss HP%
|
Attack A
|
Attack B
|
90
|
Summon Orbs
|
-
|
85
|
Black Link
|
-
|
80
|
Bone Prison
|
-
|
70
|
Curse
|
-
|
65
|
Summon Orbs
|
-
|
60
|
Black Link
|
-
|
55
|
Curse
|
-
|
50
|
Bone Prison
|
-
|
40
|
Summon Orbs
|
-
|
35
|
Tornado
|
Curse
|
30
|
Black Link
|
-
|
25
|
Tornado
|
-
|
20
|
Bone Prison
|
Curse
|
20 until 2
|
(after patch)
Rampage version A
|
-
|
15
|
Tornado
|
Summon Orbs
|
8
|
Tornado
|
-
|
8 until 2
|
(before patch) Rampage version A
|
-
|
5
|
Black Link
|
-
|
Rampage Version A: skiaclipse automatically enters a rampage at a specific %HP, and will not stop until it dies. The rampage happens automatically, and does not interrupt any other boss attacks. You and your healer must be very prepared, or you will fail the raid.
Skiaclipse rampage (already changed):
+25% skill speed, +50% damage, deals 10% max HP damage to players every 4 seconds in a big area around the boss.
|
Skiaclipse rampage (after patch/current version):
+25% skill speed, +50% damage, deals 10% max HP damage to players every 8 seconds in a big area around Skiaclipse.
|
Timed rampage - Phase 2
Rampage Version B: when you are inside the raid for too long, skiaclipse will go rampage to kill players:
Longer than 15 minutes in raid (old): +25% skill speed, x4 damage
|
Longer than 30 minutes in raid (after patch/current version): +25% skill speed, x4 damage, deals 30% max HP damage to players every 2 seconds in a big area around Skiaclipse.
|
Summon Orbs - Phase 2
Orbs are summoned at North, East, South, and West, then the orbs move towards players. When an orb touches a player, the orb turns into a white light puddle. Puddles slow players for 3s.
-Each time orbs are summoned, they move 50% faster.
-You will summon 3 mobs whenever you step on a puddle. The mobs have the same defensive stats as phase 1 mobs. However, their HP is 4'500'000, and they do not the 5 second revive effect.
-To prevent mob swarm, look closely and do not enter and leave puddles continuously.
-Or lure orbs far away, then activate them carefully by barely touching them & step away. A puddle appears but you will not summon mobs.
-Keep the bossfight away from the puddles.
-puddles are magic circles and may be destroyed easily with siege burst, detonate traps, or counterspell (and joust)
-when you destroy an orb, no puddle appears
-turn undead (scroll) works on orbs
Orb stats: HP = 2'199'871. DEF = 11'082. MDEF = 14'876. Crit resist = 507. Fire element, mutant, cloth, Small size, normal movement (not flying).
At 2% HP, the Shadowmancer master deals the finishing blow to the boss.
Your character names will be displayed in a server-wide message, together with your Clear Time (minutes + seconds)!
Special Reward (character bound):
1) the first successful party of the server receives the special title 'Banisher of Crows'. Only 5 players per server are able to get this title.
2) special title during the event: 'First Conqueror'.
These titles are never available again after the event ends.
Reward: 1-3 feathers, or a crafted Varna equipment item, or Legend Skiaclipse card (+750 insect damage per card level). A cube will appear. Pay silvers to open the cube for more rewards.
Cube price (1x extra): 9'600'000
Price (second time extra): 3'840'000
Item crafting with feathers, at Blacksmith Terry:
Weapon: 19 feathers + 3 planium.
Armour: 7 feathers + 1 planium.
Varna items have higher potential than savinose items, and Varna Smugis set effect is the best effect for skill-based-DPS in the game.
Tank or Aggro
HP: 160'000+
DEF: 50'000+
MDEF: 25'000+
Block tanker
Block: 900+
DPS
Minimum of 1 invincibility skill
Attack: 20'000+
DEF: 20'000+
MDEF: 20'000+
Critical dps
Critical rate: 1200+
Healer
HP: 151'000+
DEF: 40'000+
MDEF: 20'000+
Healing: 3000+
Most builds are viable. It depends on your confidence, gear, and teamwork!
Healer recommendation: priest + oracle + diev
DPS: bullet corsair assassin/linker, mergen fletcher ranger, pyro/ele/tao/onmyoji, doppel high barb, fencer matador barbarian
Tank: any warrior with high HP & DEF and activated attribute for more aggro, or peltasta pick (taunt)Choose between:
A) Standard set-up with tanker: 1 heal + 1 tank + 2 DPS + final DPS or final utility.
B) No tanker: 3 DPS + 1 utility + 1 heal. Tank attacks together, inside foretell.
Healer (required for every party): requires high DEF & MDEF, high HP, and best play, because full support does not have any invincibility skills or movement skills to dodge attacks.
-Priest revive must be saved for bone prison %HP.
-Always use revive before the bone prison %HP, just in case you are the one to get silenced and trapped.
-(you are not trapped by bone prison): keep healing the player who is trapped inside the bone prison. That player receives very high damage per second.
-Jump to avoid boss landing impact during bone prison.
-Boss does not like to use smoke blast and thunder on aggro/tank.
-Boss does not turn around to use thunder. Watch out when you see skiaclipse raise its right-claw.
-If the boss turns away from the aggro for no reason, you must expect smoke blast in the face.
-Healers must remember all % thresholds and prepare in advance to burst heal the affected player if needed.
-Healer must remember who has been resurrected already. Do not waste resurrect cooldown.
-Oracles, please use counterspell to destroy orb-light-puddles, and counterspell to destroy tornado
-Use fade on party to prevent skiaclipse dive attack after thunder
-Oracle twist of fate is useful for phase 1 near 5% HP, and at phase 2 near 2% HP.
-Priests with turn undead may attempt to one-shot orbs. Prevent accidentally activating orbs! Try this at a safe distance. Turn undead is a random chance skill. It is not a guaranteed one-shot.
Aggro or Tank (if you bring one): aggro requires more help from healer than tank. Tank builds have skills to mitigate damage.
-requires sufficient DPS to keep aggro. Warriors have an easy passive provoke attribute to keep aggro.
-Remember the 30-seconds-taunt immunity if you are peltasta or matador. Do not taunt too fast.
-You must tank all claw attacks to prevent boss stacks. When you have to move to a new location, watch the boss carefully and tank remaining claw attacks before you sprint to the next location.
-Once phase 2 starts, immediately lure skiaclipse away from the middle. If skiaclipse spawns puddles & clouds in the middle, your party will die during bone prison.
-The boss will almost never use thunder or smoke blast on you.
-Stand next to the wall, and make skiaclipse face you, so your party has more room to move around to dodge attacks.
-Be careful of the gimmick portals opening. You might accidentally enter the gimmick room and lure skiaclipse to that room.
-You are the one to decide your battle location. You must look for a safe spot with less puddles & clouds, then call the number of the direction! Often, parties start moving towards 3, then 5, then 7, then 9, then 12, and so on.
-Keep an eye on your party members. Skiaclipse might have spawned clouds & puddles on them. They cannot stay and fight. You must move immediately. Remember skiaclipse rampage timer. Do not waste time.
-You must not move towards your party to take curse, because skiaclipse will claw-attack in their direction. Let the player with invincibility skills take curse instead. Keep holding aggro.
-Lancers, please use joust to destroy light puddles and tornado
DPS & utility: if you have a tank or aggro player, you must stay away from boss claw attacks.
-Stay behind the boss and watch for smoke blast, thunder, and dive.
-Boss does not like to use smoke blast and thunder on aggro/tank.
-Boss does not turn around to use thunder. Watch out when you see skiaclipse raise its right-claw.
-If the boss turns away from the aggro for no reason, you must expect smoke blast in the face.
-Use your invincibility skills if you think you cannot run away in time. Builds with featherfoot (levitation) are immune to claw, and immune to dive.
-call PASS if you have a chrono
-at least 1 wizard must have max magic shield to reduce damage from true damage attacks. Turn on Party share attribute on magic shield.
-decide before raid what you will do when orbs spawn. The boss does not wait for you to deal with orbs, so you must keep avoiding attacks. Some builds cannot kill orbs easily. Some builds have a very easy time destroying puddles (cannoneer, oracle, sapper).
-does your build have invincibility skills? Then take curse from player without invincibility skills. Run far away from party and use your invincibility skill to survive curse.
-if your tank or aggro gets curse, you should move away until the curse has activated and let healer take care of HP.
-let other players know with 'mmm' when you are in a bad position and meteor drops on you. They can move in to divide meteor damage.
-DPS is responsible for killing the bone prison as fast as possible
-Boss will not select you for bone prison if you (accidentally) use skills like chrono stop near %HP thresholds. However you must be prepared to use another invincible skill after that, just in case.
-archers and wizards should use movement skills to break black link faster
-please destroy light puddles and tornado if you are sapper or cannoneer. Stand close and use detonate traps or stay far with siege burst.
Skip gimmick: the gimmick clear grants +100% damage and +100% healing buff for 30 seconds to all players. Gimmick requires 1 player each time. You need 5 players vs boss! Nobody bothers with gimmick. Raid is very possible even without gimmick.
OLD Videos (before episode 11 & 12)
The Best Clear with Taoists Video by 튼튼
Other Videos (before patch)
The struggles of Phase 2 Video A
Meta party clear video
More Clear - success (after patch)
NiNaNo's team by 디즈니 video
-1 healer, 1 tank, 2 magic DPS (wizard & cleric), 1 summon utility
-rising build with krivis: divine stigma, melstis meltdown DEF & MDEF debuff
-Exorcist rubric easy 999'999 on phase 1 demon & dark summons
-Bokor zombie phase 1 mob lockdown with bwa kayiman
-Retiarius net for phase 1 mob grouping
(1)Blink's team by HWI TOS video
-rising lancer build for easy 999'999 with lancer's super strong DEF penetration
-remaining party composition is similar to (2)
(2)Blink's team by HWI TOS video
-necromancer flesh hoop weakening attribute + appraiser devaluate + wizard's lethargy to decrease boss damage by a lot, so they can tank boss attacks together during foretell
-cannon + appraiser + zealot penetrate boss DEF
-shoggoth draws aggro from phase 1 mobs, and shoggoth debuff buffs physical damage
-summons distract boss dive attack
(3) other Blink team by Skippy video
Legend's clear team, healer point of view video
-standard magic dps party
Vaivora's team by tsai tom video
-standard set-up with aggro warrior, x2 magic dps, healer, and falconer

Raid Music
Phase 1 - Draconic Bellum by SFA
Phase 2 - Mas Rapido by SFA